Project
Projecttitel:Jasper Wasp Clone
Status: FINISHED
Startdate: 01 March 2016
Duedate: May 2016
Manufacture link: https://www.muffwiggler.com/forum/viewtopic.php?t=155378
Sale
if you looking for a assembled device, please contact me
Order Thread: https://www.muffwiggler.com/forum/viewtopic.php?t=151625&start=450
Build Thread: https://www.muffwiggler.com/forum/viewtopic.php?t=157937
Build Guide: Jasper Construction Guide.pdf (version 1)
Build Guide rev.2 Jasper2 Construction Guide.pdf (updated in Aug.2016)
BOMs:
Jasper BOM.pdf (version 1 until July 2016)
Jasper v2 BOM.pdf (version 2 rollout July 2017= with embedded Enhanced Mode function,)
notice: 4M7 for LFO timing. Use a 5% carbon resistor here, so there is some minor variation in modulation between the two modules.
Important for rev.2+3+4: please read !
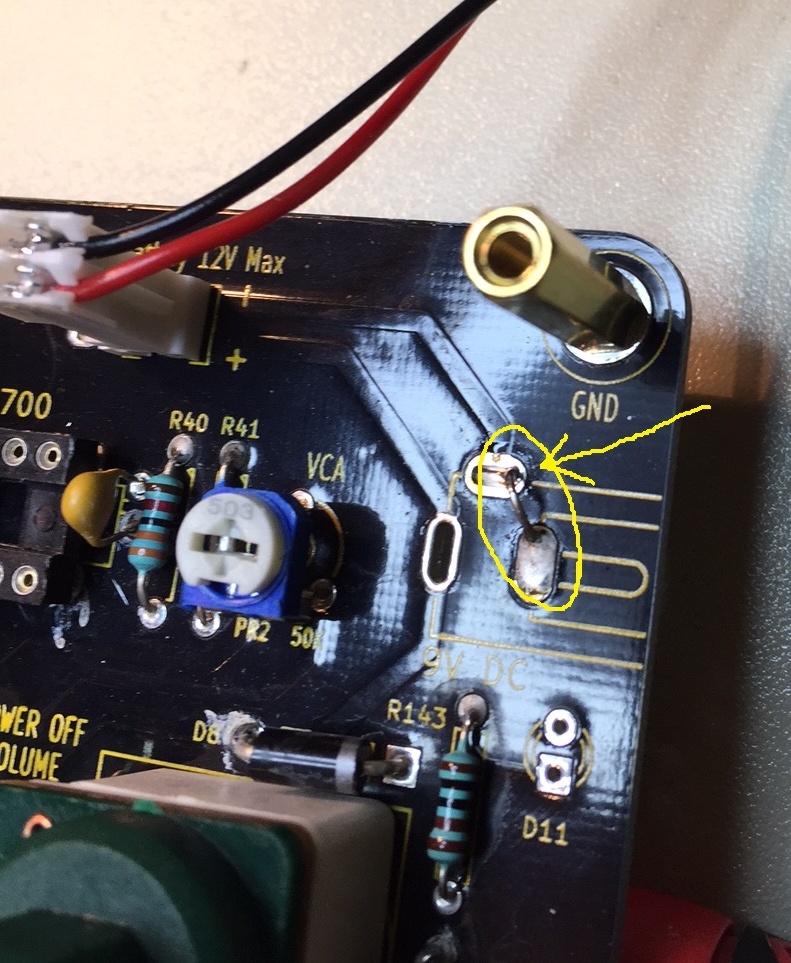
If you do not wish to use the external trigger at all, simply solder the cathode lead (with the line) to the square pad on the right, closest to the label D9. You can leave out R172 and the Ext Trig Mod header.
LFO MOD: for C36 instead of 1uf
1. original 1uF LFO speed
2. slow 11uF LFO speed
3. slow LFO in situation
Tipp: use a 10uf bipolar electrolyt cap
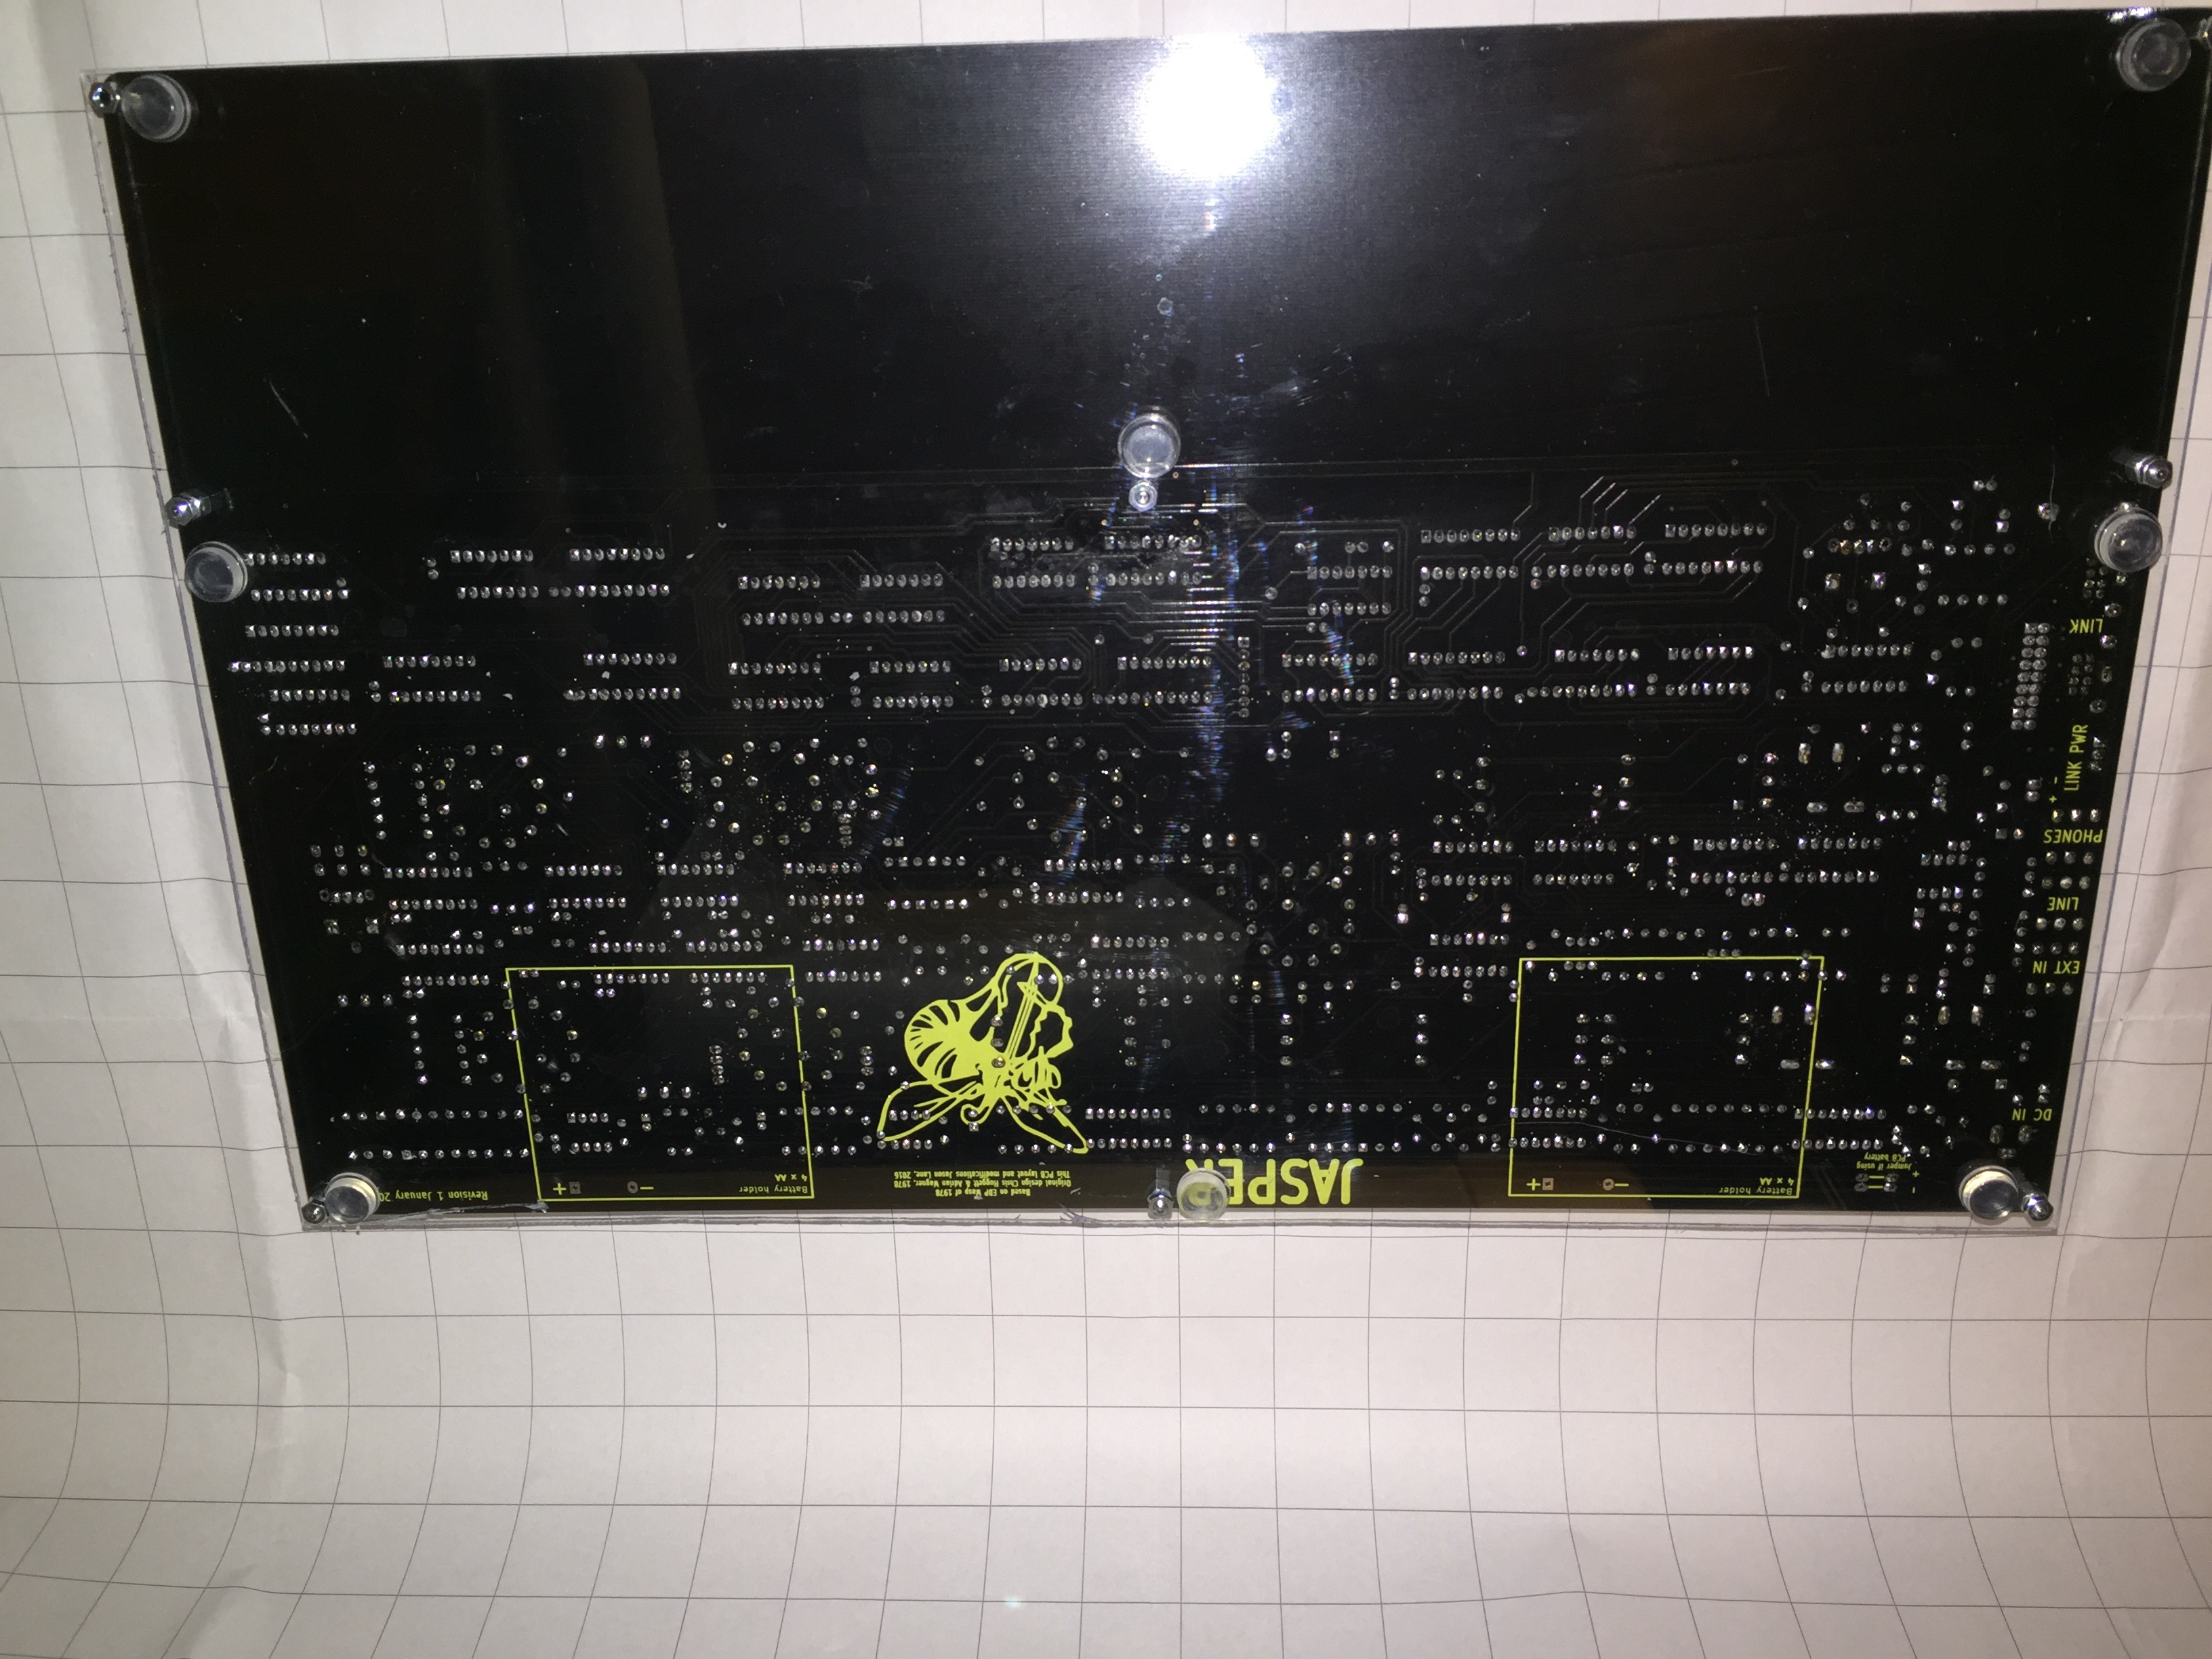
Case:
use a acryl plate for bottom,
planned are sidepanels avaible on muffwiggler jasper thread
Jasper PCB and Panel Measurements.pdf
Info from Muffs:
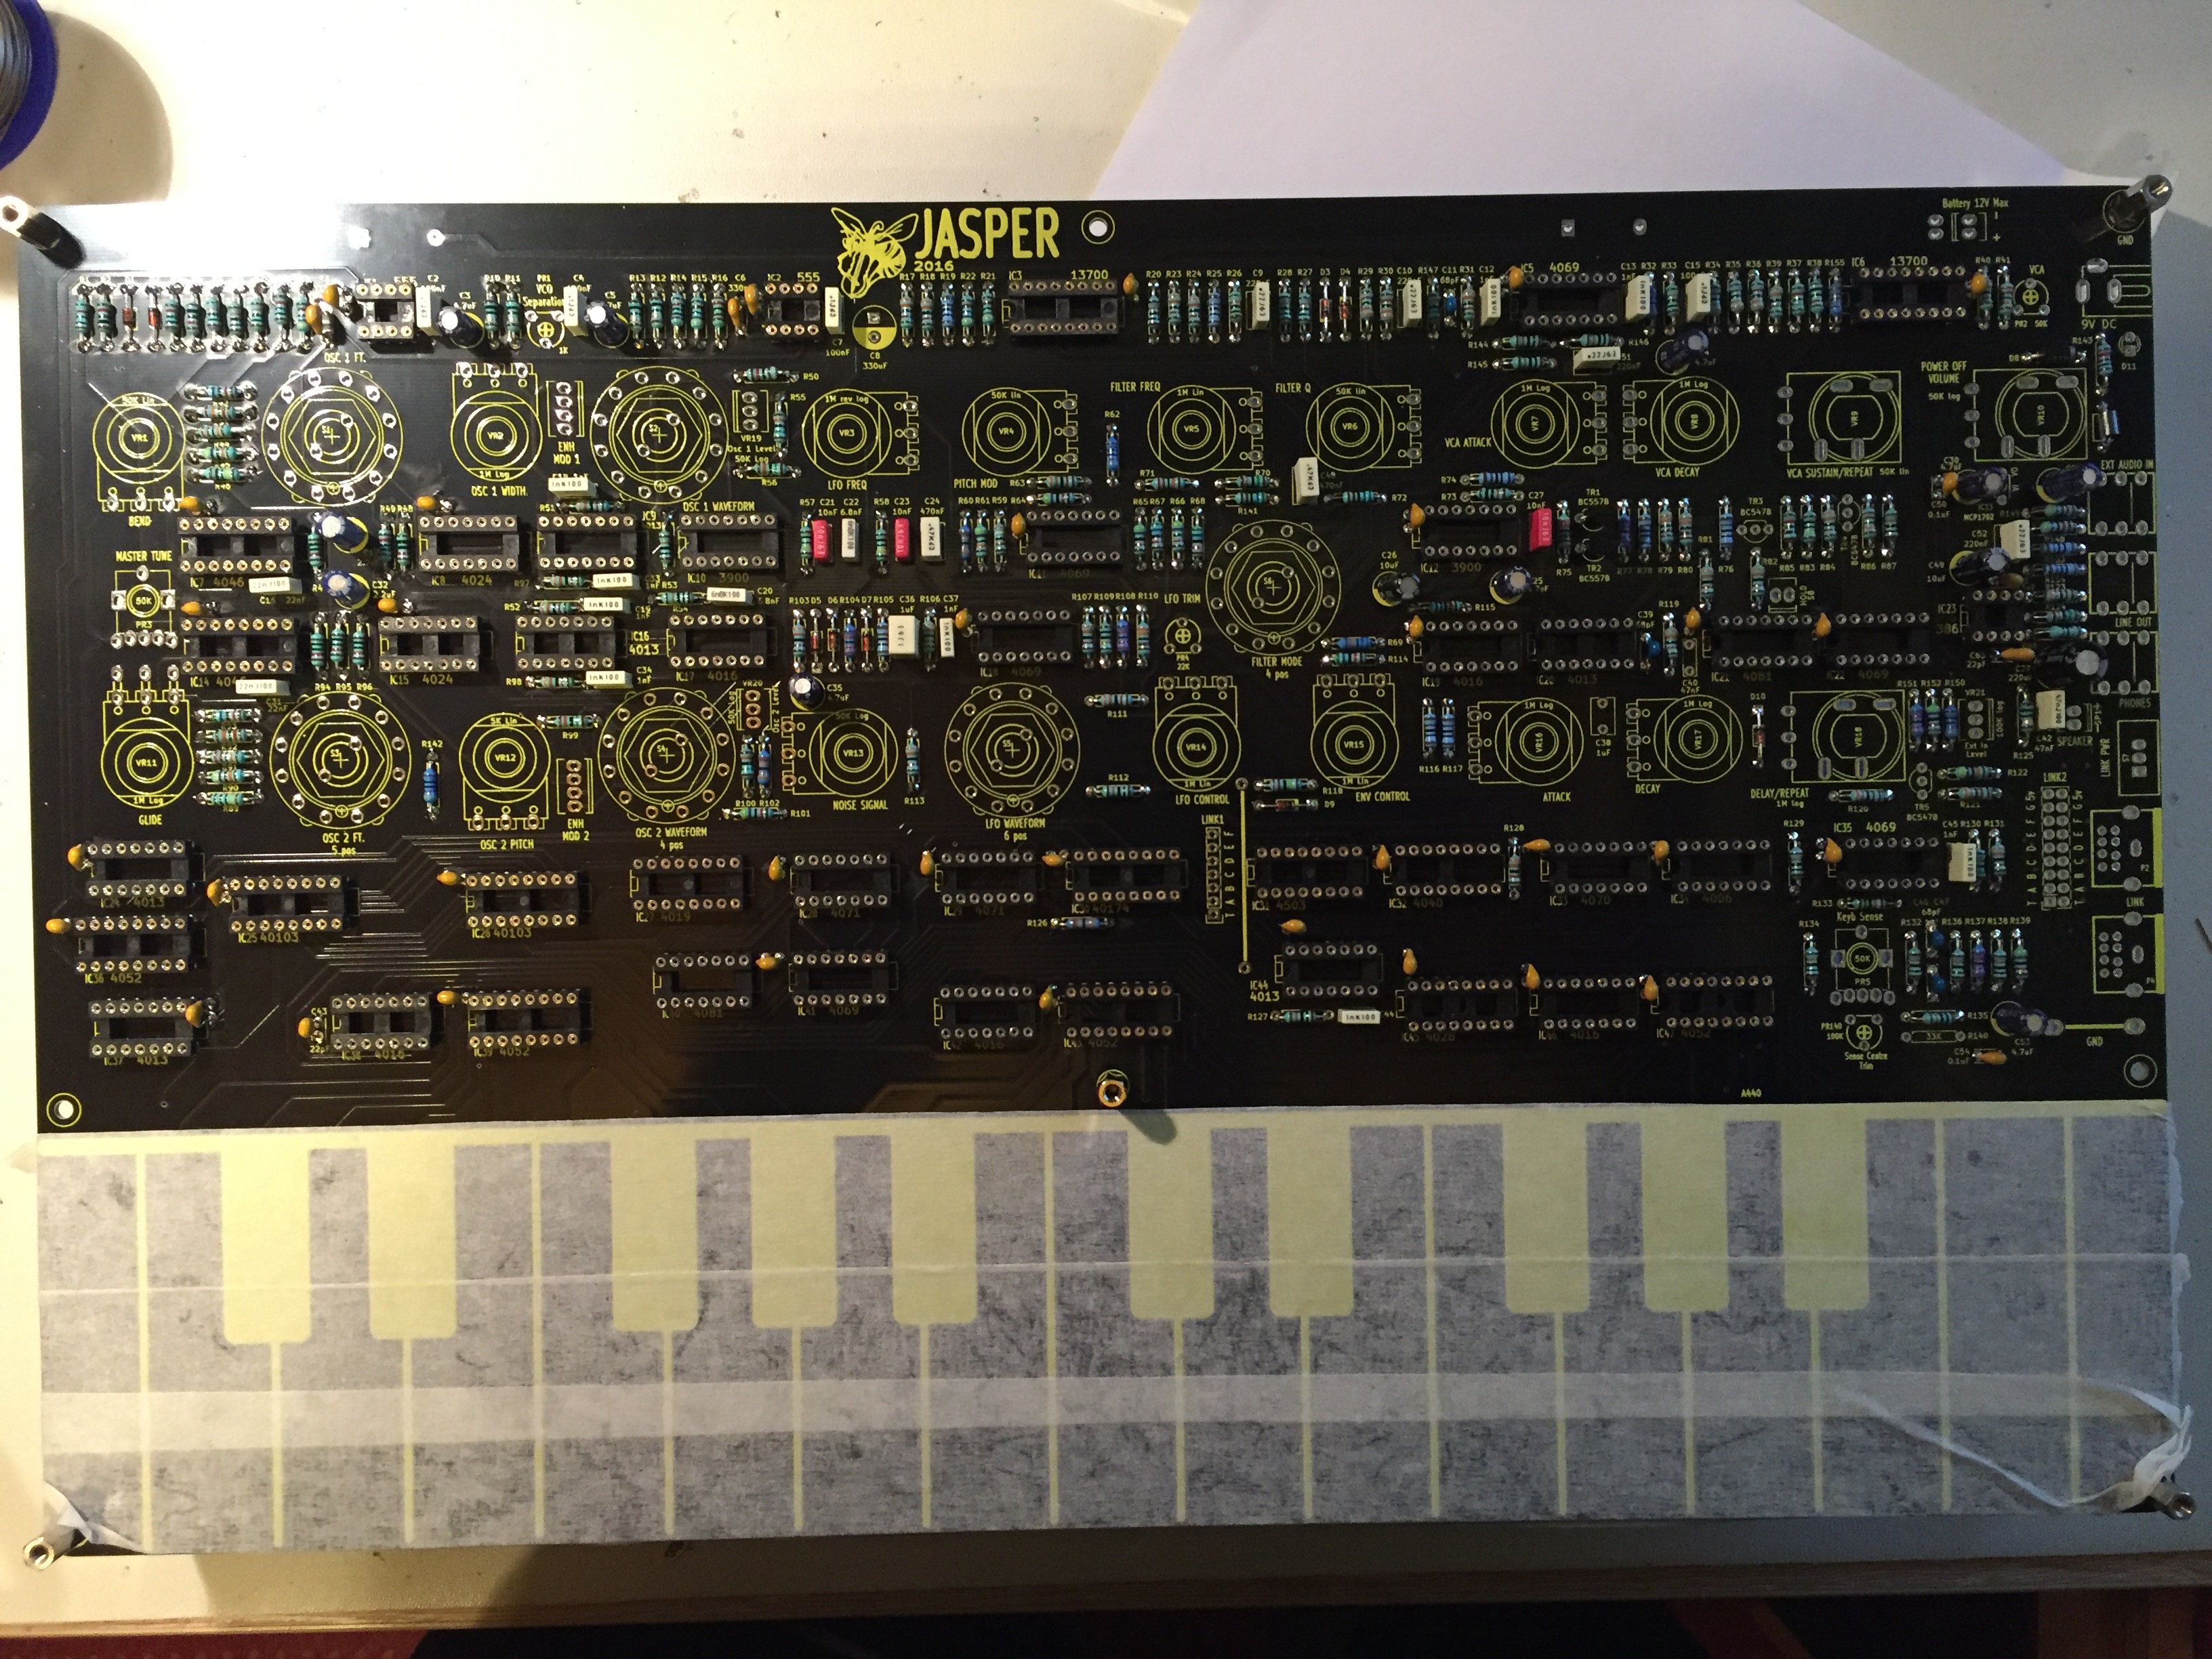
Apart from the CD4006 in the noise circuit it uses easily available components - all the ICs are new TI parts available from Mouser or Farnell. The 3080s in the original are replaced with a pair of LM13700s.
The transistors are BC547 and BC557. The rotary switches are normal Alpha 2x6 PCB pin switches, the normal pots are 16mm Alpha vertical pots from (MusikDing or Smallbear) with the pins straightened to match the height of the switched pots and rotary switches. The switched pots are Omeg ECO16 types available from CPC/Rapid/Conrad. All the controls are mounted on the top side of the PCB.
Cliff stereo 3.5mm audio jacks, and 8pin mini-DIN sockets for the Link port, and a 2.1mm DC jack are soldered onto the right hand side of the PCB.
Electronically it's almost identical to the original Wasp, but I had to change some component values for it to work with 1M potentiometers (the original used a number of 2M2 pots - not common now). Also the keyboard sense circuit had to be altered to make it work with a new TI CD4069 chip. There are some extra decoupling caps on some of the ICs and LM386. It also uses an MCP1702-5002 LDO voltage regulator in order to work even longer on batteries. Without the speaker active, it draws about 30-40mA, and about 120mA when driving a speaker.
There are a few extras on the PCB:
Notch filter setting. There are a pair of unused CD4069 units in the filter I used to implement a notch filter, like Juergen Haible's Wasp filter clone.
Buffered audio input. This uses a pair of unused CD4069 units on the right hand side to implement a buffer with variable gain that can be mixed with the two oscillators and noise.
Oscillator volume pot headers - like the Wasp deluxe. These fit via flying wires to the panel, or can be jumpered as on my prototype.
'Enhanced' waveform option headers: like the Gnat. This is a PWMed pulse wave with a fixed LFO made using a single 4069. Two of these are on a small PCB, and connect with flying wires to the main board. I'm awaiting delivery of this prototype PCB. The headers for this are kludged onto my prototype board, but are included if I make another set of boards.
Two 4x AA battery holders with PCB pins can be attached underneath the PCB. Intended for use with 8x NiMh batteries.
The Link port is implemented using 8pin mini-DIN cables and sockets. These are easily available, and save confusing Link with MIDI. I made an option of using the spare wire to carry power - so Jasper can power other devices using the Link port.
I've got an unfinished control panel and bottom plate in a CAD program - haven't decided whether to use an aluminium panel, or use laser etched/cut wood or acrylic. The PCB should work OK in different styles of enclosure - it is 250mm x 398mm.
There's no MIDI on the PCB - but it should be straightforward enough to make a simple MIDI-Link controller using a microcontroller.
Build notice:
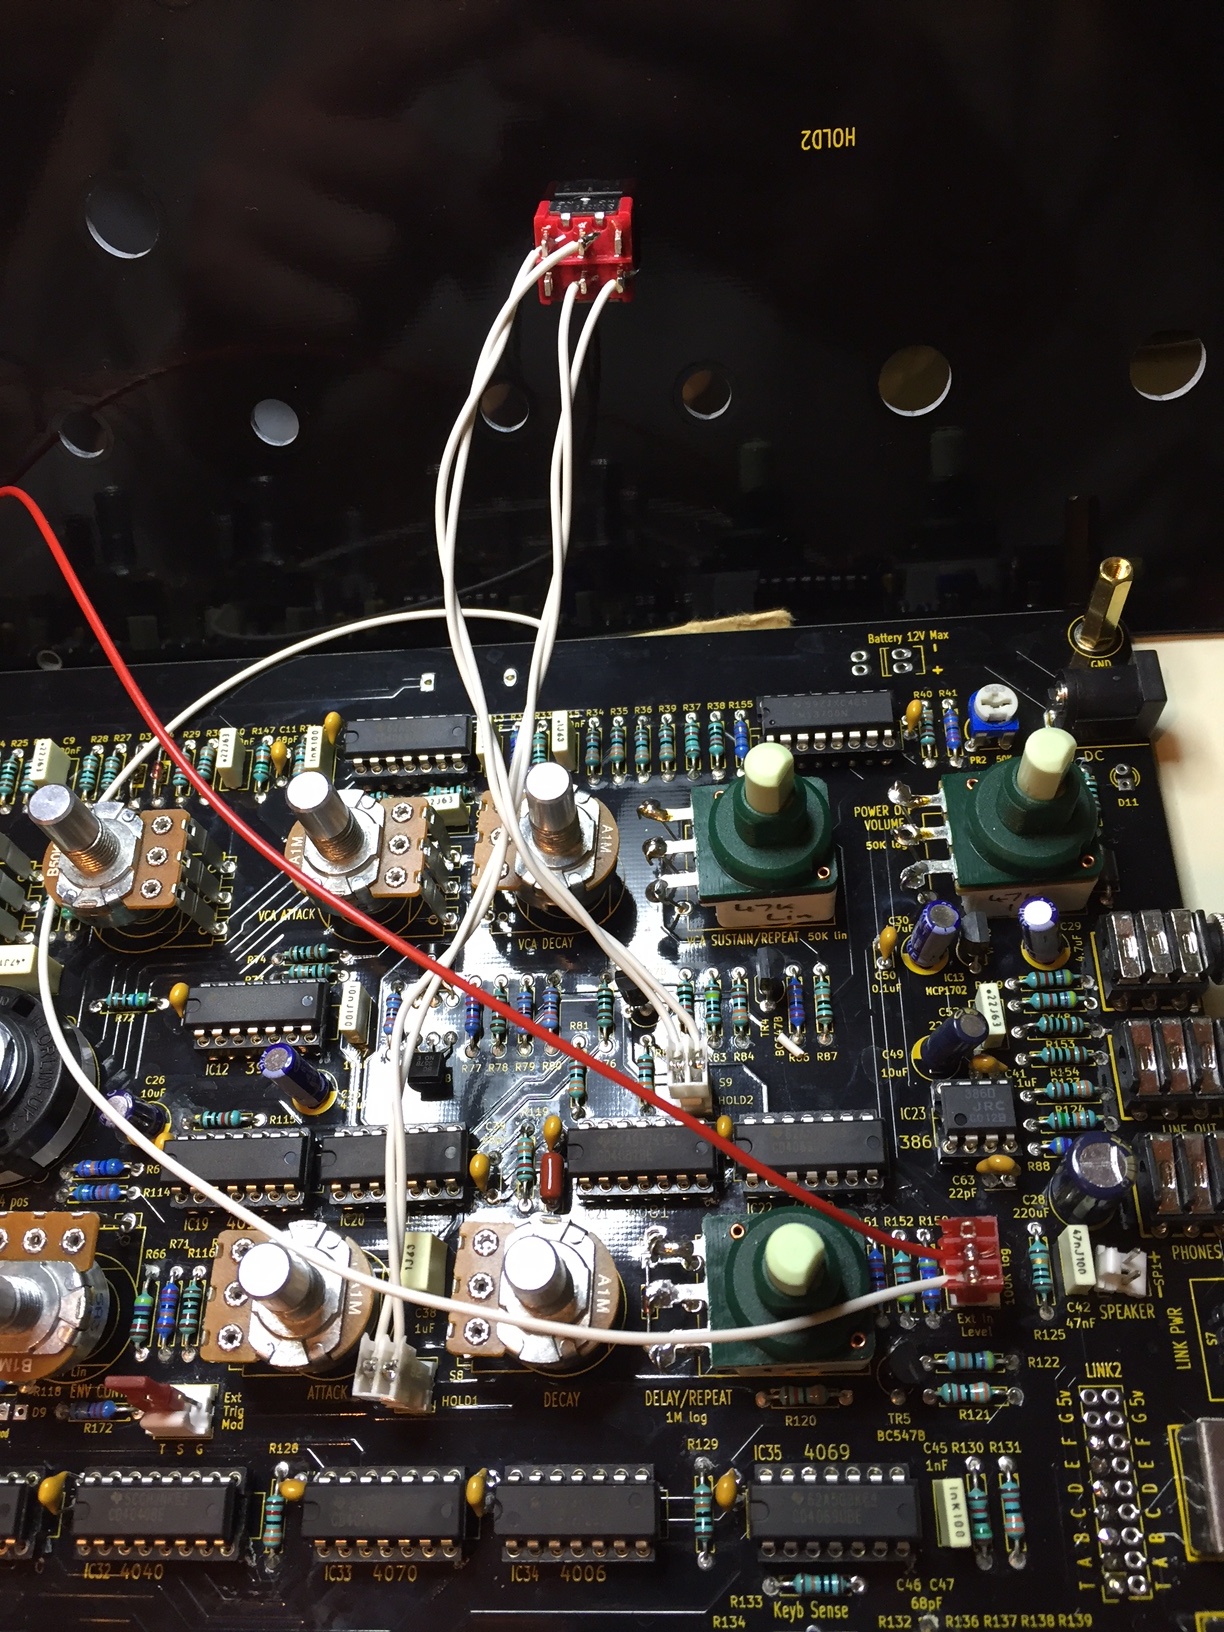
Hold switches:
(solder the BC547/557 flat - close to the pcb - otherwise a switch wont fit)
External Metal case usage:
i prefer the Usage of 2x 6,3mm jacks for output at the rear, further the external trigger, MIDI, CV connection and Power Input jack
for Power Input run a cable from the MTA100 header to a DC connector, bridge as shown on the pcb the connection.
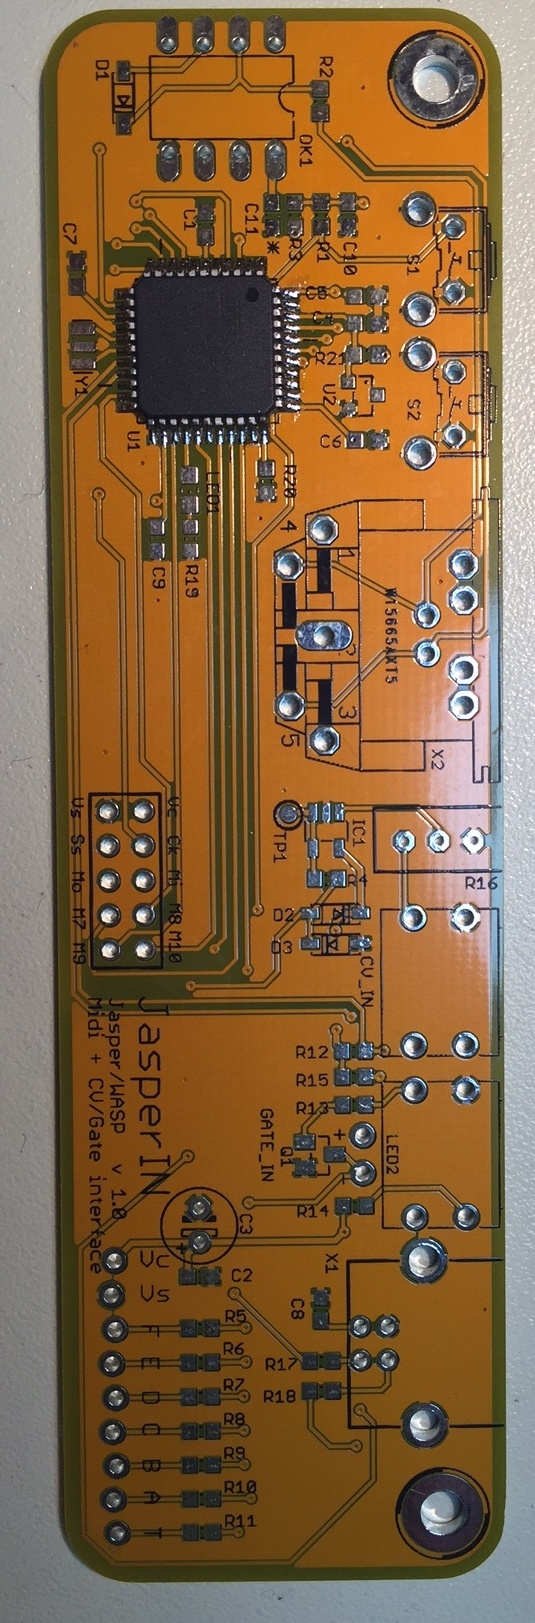
Midi and CV Mod:
i ordered on muffwiggler the CV-MIDI board (unassembled)
for pre-assembled Versions:
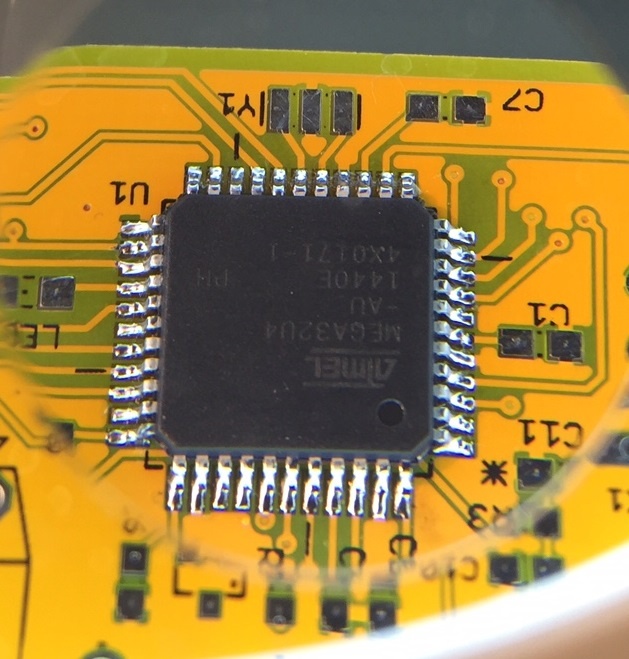
Yes, you will need to flash them with the firmware, it should be pretty straight forward.
The chips already have the halfkay(teensy bootloader), so you just need to flash the firmware by USB.
The JasperIN needs to be installed and the Jasper powered for this to work, the board is powered by the Jasper, not by USB.
Download the Teensy Loader for your OS from here:
https://www.pjrc.com/teensy/loader.html
Download the firmware:
http://misw.us/jasperin/JasperIN.v0.09.zip
Just load the firmware into the Teensy Loader, some usb controllers auto detect the teensy and put it in bootloader mode automatically, if it does not do that, just press the switch closest to the DIN socket.
More details on how to configure midi channel, etc
https://www.muffwiggler.com/forum/viewtopic.php?t=172630&start=0
Version 1 pcb: