...
| ID | Date | Bug/Issue/Improvement | affected part/pcb | Issue | Fix | reported by | reported to developer | affected version | fixed pcb version |
|---|---|---|---|---|---|---|---|---|---|
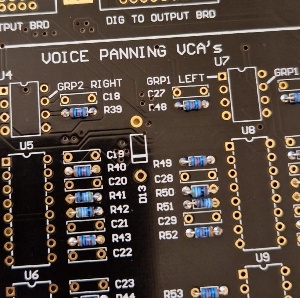
| 1 | Jan 2024 | Silkscreen wrong | Voice Motherboard | diode wrong silksvcreen orientation D13 | install against silkscreen | modwiggler user | no | diy | |
| 2 | 25.Jan 2024 | info | PSU | check that your PSU is still modified with other regulators my psu was still modified with the correct parts | just a visible check and keep in mind to test the psu later without attached Device/pcbs | Patrick | diy | ||
| 3 | 25.Jan 2024 | build info | Voice and Voice Motherboard | you have to respect that the MOLEX connectors on the Voice Motherboard and Voices have to installed in one step. You cannot start with soldering the molex connectors at the pcb without align it against the opposite part. do this: option 1:
option 2: a. insert in voice 1 the molex connector and solder only one middle pin per connector, correct the alignment If required b. insert in the connector the connector which is required for the voice mobo. c. put the voice to slot 1 and solder it - one pin per connector d. check, align and solder more pins |
Pictures from kickstarter (link)
...
