Here are some important Issues and Fixes from the first batch TTSH pcbs (delivered around March 2014)
...
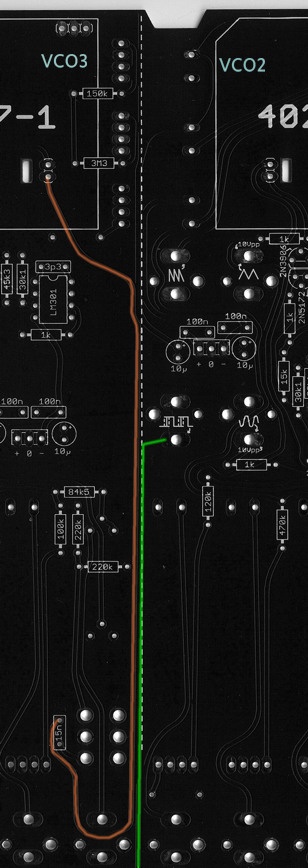
update 01.October 2014 VCO2/VCO3 bleed fix
(page links/anchors)
- pcb silkscreen failure for powersupply
- Hum issue on Speaker and more
- Noise "distorted"
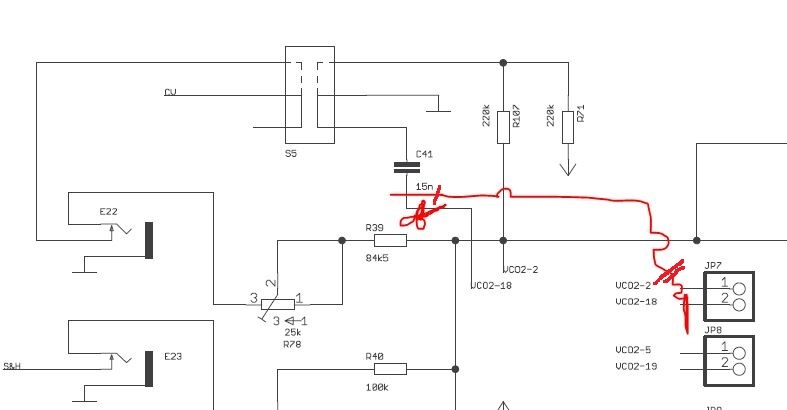
- Clock bleed on VCO pitch
- wrong Silkscreen for matched pairs
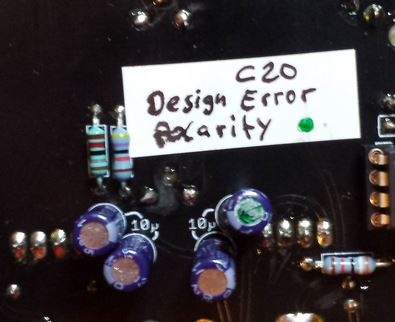
- wrong Silkscreen or polarity for Capaciator C20
- VCO Bleed - Regulator
- not all LEDs are working
- LED Dimming Fix
- VCO2-VCO3 Bleed fix
...
Solutions:
![]() = tested
= tested
![]() = untested
= untested
FIX for pcb silkscreen failure for powersupply 
...
Option A: the easiest way is the usage of a BC337-16 with folllowed orientation, there´s no need for addional parts.

Option B (from nordcore)
leave out the 2n5172 - use a bc337-40, - bend right leg to top, solder a 10K resistor in series to the 1uF cap.
...
FIX for wrong silkscreen or polarity for capaciator C20 in RINGMOD section valid
| Anchor | ||||
|---|---|---|---|---|
|
change the polarity of C20 10µF elecrolytics (its the right hand capaciator)
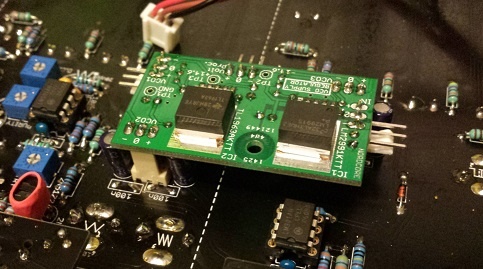
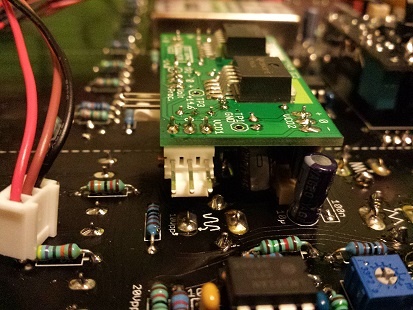
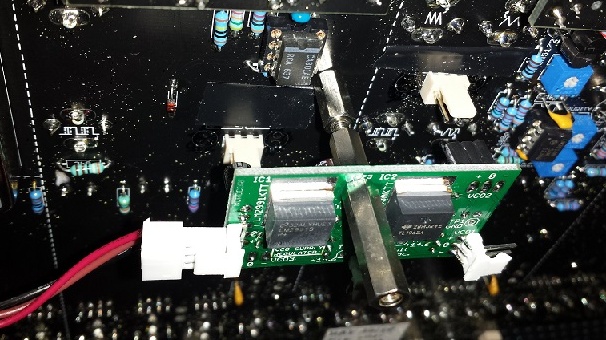
VCO Regulator:
| Anchor | ||||
|---|---|---|---|---|
|
...
- build the VCO regulator
- desolder or cut the MLCC 100N from the power inputs on all 3vcos and from voltage processor, the 10uF caps can leave out too (but its okay to have this)
- drill a hole in pcb to mount by a 10/12mm spacer the pcb.
- put a further spacer on the 10/12mm spacer for calibrating the VCO regulator (dont connect the regulator to the vco header yet.
- connect only power input to regulator and set it to 14,6V (TP1+ TP2, TP1+TP3)
- unmount the second spacer and place the regulator in MTA header for final calibration/further tesing/building.
Issue: not all LED´s are working Anchor LEDs LEDs
| LEDs | |
| LEDs |
...
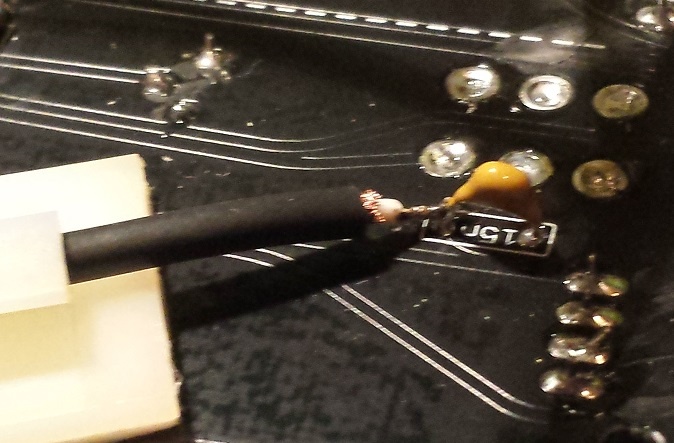
wire a ground to shielded cable shielding