| Panel | ||||||||||
|---|---|---|---|---|---|---|---|---|---|---|
| ||||||||||
Projecttitel: ISE-NINStatus:
Startdate: 26th Aug.2022Duedate: 15th Sep.2022Last page update: 02.Nov.2022Manufacture link: https://black-corporation.comModwiggler: https://www.modwiggler.com/forum/viewtopic.php?t=265268Facebook Build Group: https://www.facebook.com/groups/517757979447099Facebook User Group: https://www.facebook.com/groups/800008500661600 |
...
| Panel | ||
|---|---|---|
| ||
Here is a step by step guideof what I think is the correct wayto calibrate the filter resonance:1. solder a header pin to the "GND" and the "24db filter output" pad on each voice to be able to connect your oscilloscope! 2. I would advise to only put in one voice card per procedure. The cards are quite close to each other and by putting in multiple cards at the same time you risk touching sensible points with the metal tip of your scope probe or your screwdriver! 3. put voice card 1 in slot one and connect your scope to the header pins. (I recommend turning the resonance trimmer TR1 fully clockwise on each voicecard to make this procedure as easy as possible!) 4.(ONLY AFTER that you need to calibrate filters in further step)It´s recommend turning the resonance trimmer TR1 fully clockwise on each voicecard to make this procedure as easy as possible! The best way is to use 8 resistors on the motherboard for making a measurement. 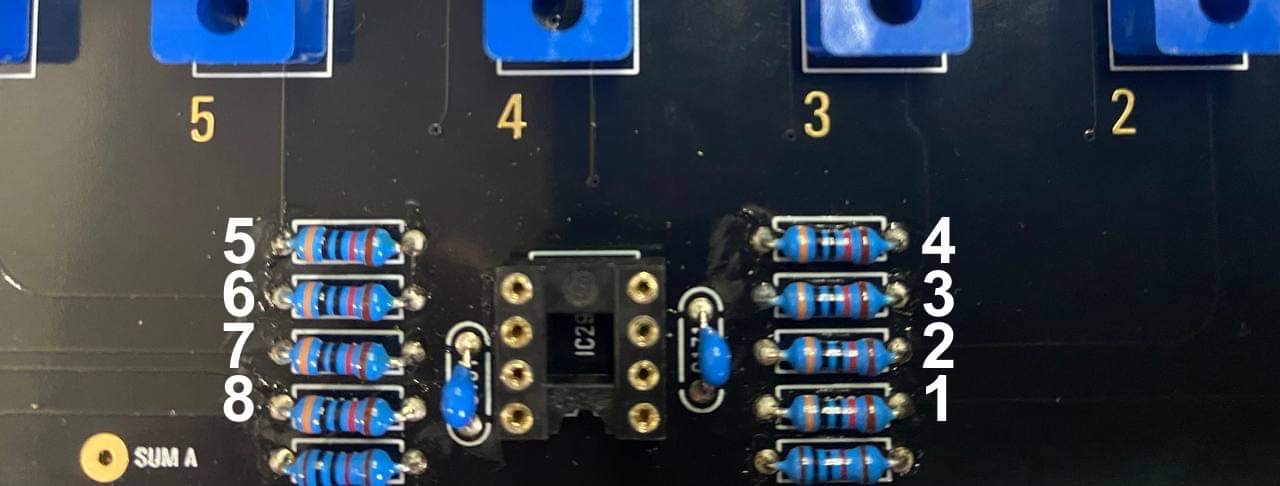
6. scroll down to "Calibration" and push the encoder to get into the calibration menu. 7. scroll to the "Filters" tab and push the encoder
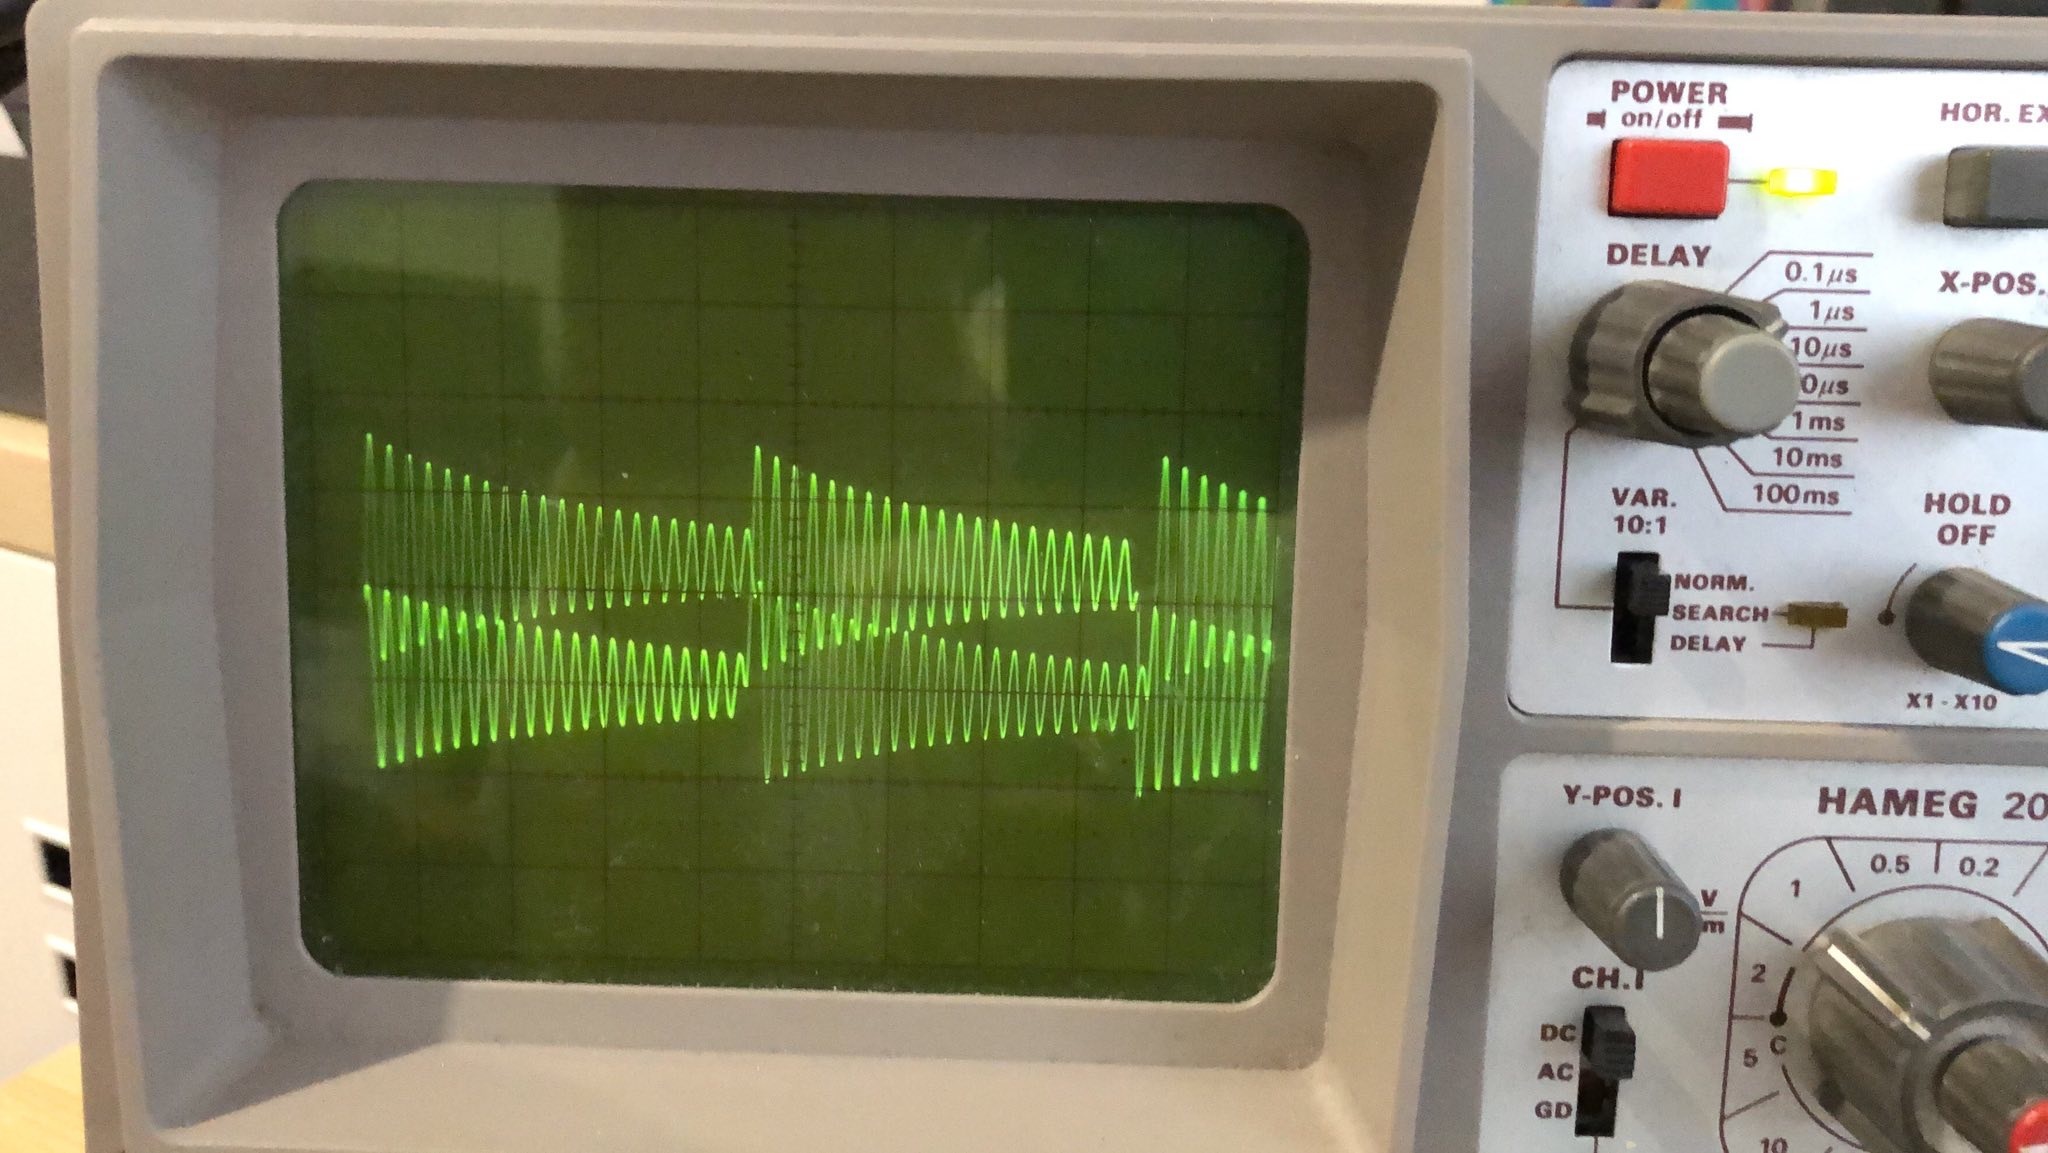
Comment from Black Corp: "We especially made all settings in resonanse calibration how they should be (square, cutoff, 12db etc)." 5. the filter resonance 8. select "calibrate voice 1" and push the encoder and then press "Enter" (leftmost button under the display) 9. the filter calibration should now start! Attention: In case the display reads "no signal" exit the menu and turn the "resonance trimmer TR1" on the voice card in full clockwise direction and try filter calibration again. It should now pass through.10. Exit the "filter calibration menu" and scroll down to the "Resonance" menu 11. Push the encoder. The display should read: "card 1" and you should hear a test tone through the outputs (for the next voice card you can press the "next (Back)" button to cycle through the voice cards.12. set your oscilloscope to "timebase 0.5ms/cm" and "1V/cm" 13. You should see the filter signal. If you have turned the trimmer fully clockwise the signal should be- and sound distorted. 14. now turn the "resonance" trimmer TR1 anti- clockwise until you get a clean signal as in the picture below (The difference of maximum and minimum amplitude in one cycle has to be 4-times.). 15. Exit the menu, turn off your ISE-NIN, remove "voicecard 1" and repeat steps 1 - 15 for the other voicecards one by one!
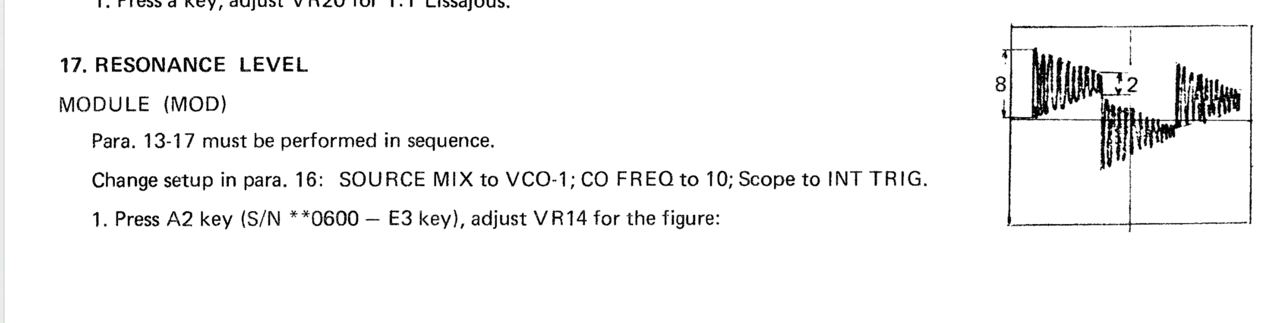
Congratulations, you have successfilly calibrated the filter resonance for all of the voices! Resonance calibration Method according to the Roland Jupiter-8 service manual (not recommended yet → use above method!!!):Go into MENU, CALIBRATION, RESONANCE. Follow these steps from the Jupiter 8 manual, turning Trim1 for each voice (or see below):
Workaround or turn Trim TR1 until the self oscillation is off on each voice. you can switch between the cards using the switch button on the mother board. |
...