...
install the 12mm spacer on the HW.board, then install the 10pin dual row header/socket - solder both parts on to each pcb, clean these solderpoints with eartips this solderpoints carefully.
install the sliders on the Hardware Board, and carefully solder them - pin by pin - as described in the above list table (do not overheat the parts)
then finally we can move to the last steps:
install the tactile switches and solder thisthese.
the last parts can be installed with one step or step by step - but in this case, you have to remove the frontpanel a few times. (customers with experience from DDRM/Kijimi can try to install the pots, OLED, LEDs, tactiles in one step)
...
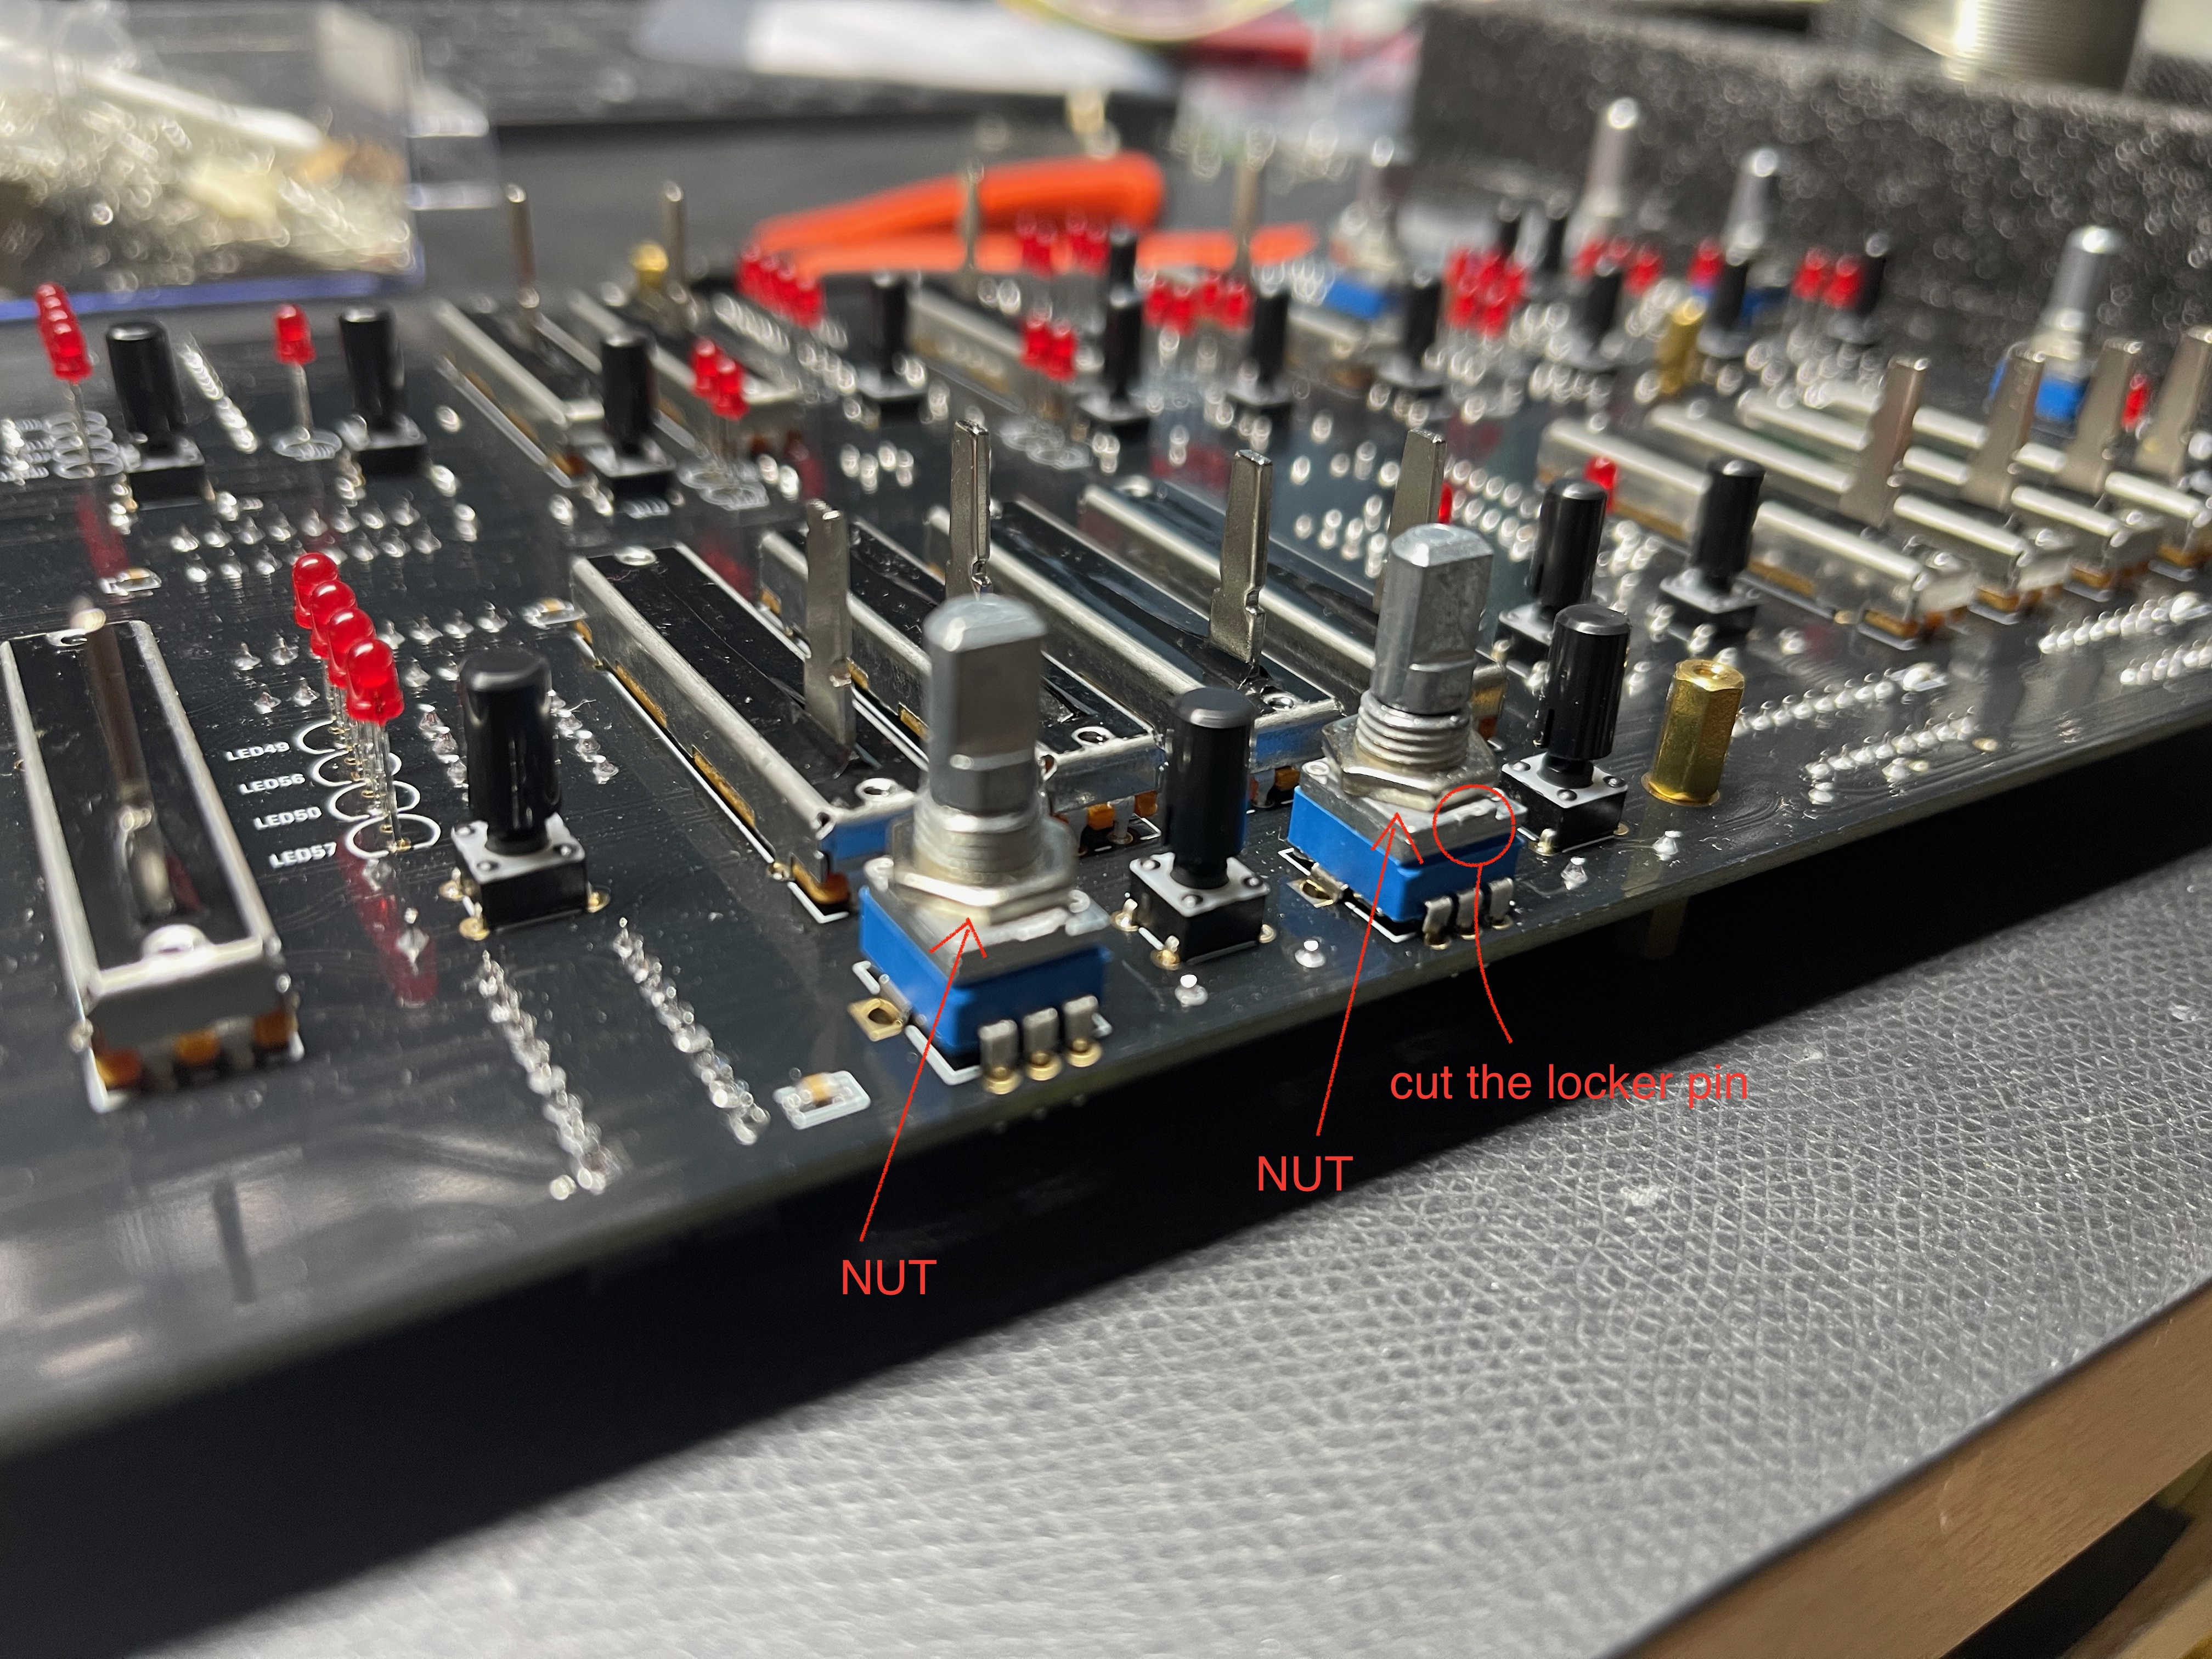
cut the locker pin on the potentiometers, install a nut as shown a nutbelow .
LEDs:
here´s an example how to install the LEDs easily:
...
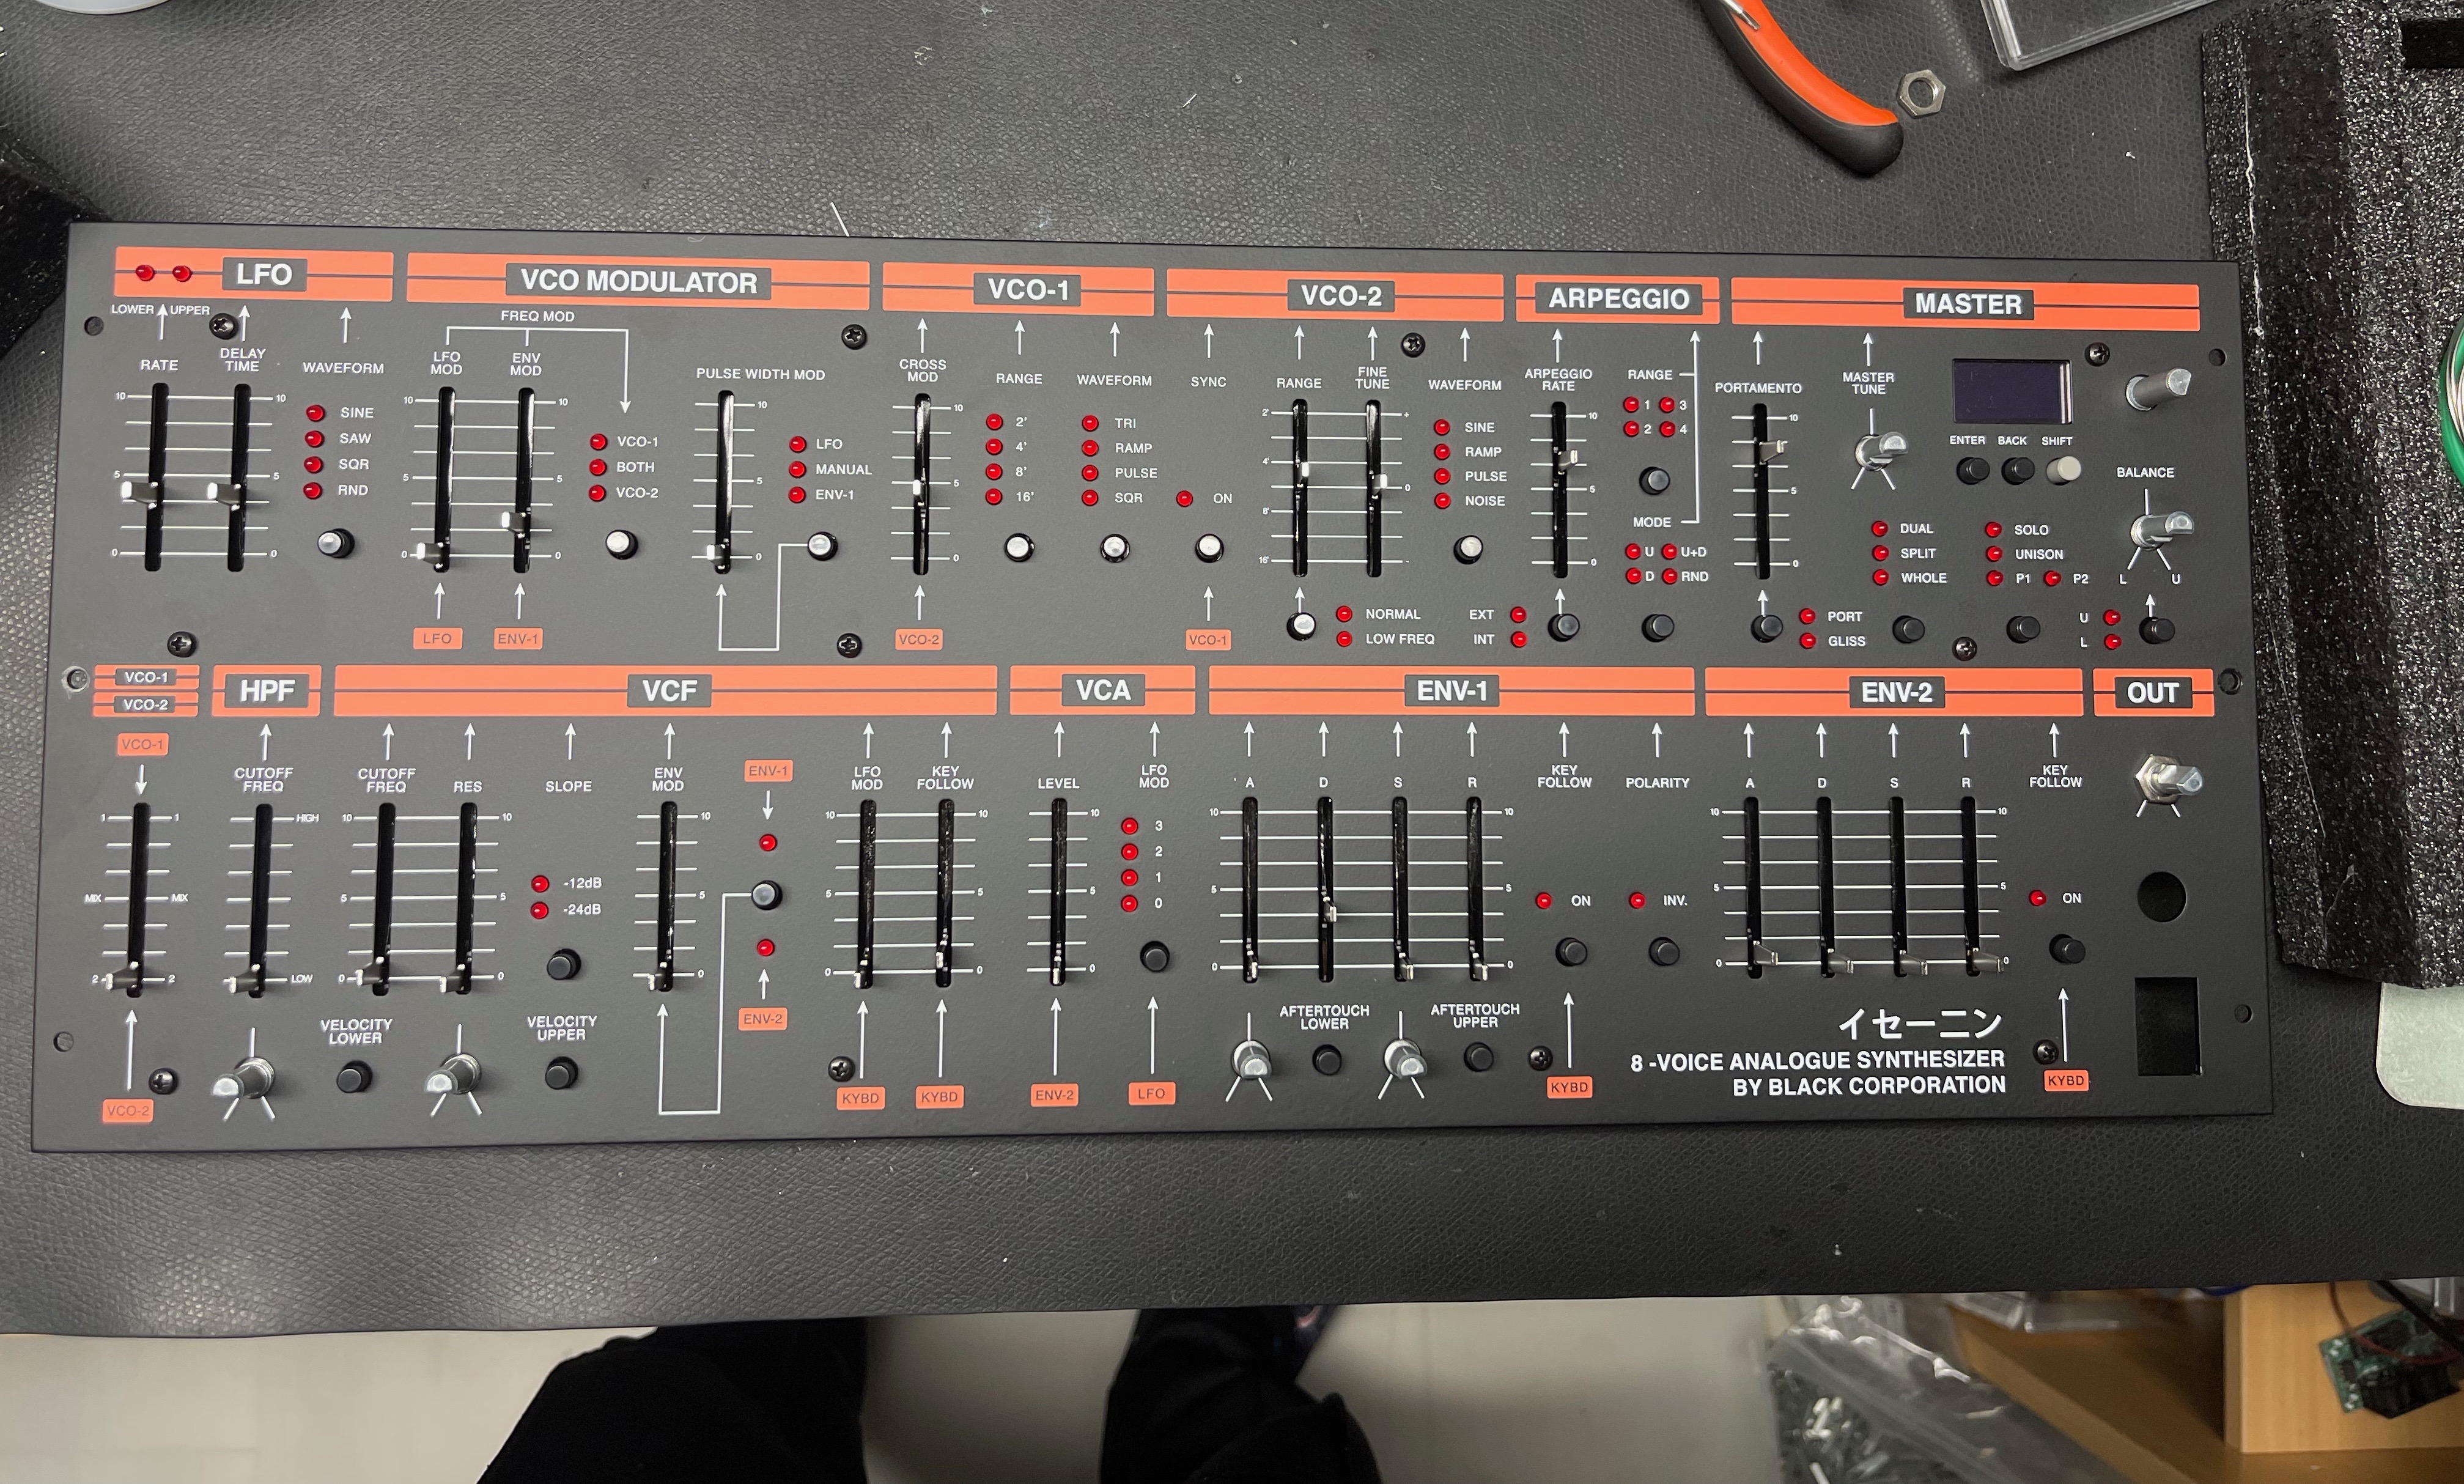
Instructions for Calibrating
• First, put all CENTER DETENT pot / sliders at center,
• Go into MENU, CALIBRATION, SLIDER POT CALIBRATION, run
• (after 30 min of warmup), go to the MENU, CALIBRATION, VCO CALIBRATION, run.
• MENU, CALIBRATION, RESONANCE. Follow this these steps from the Jupiter 8 manual, turning Trim1 for each voice (or see below):
...